
Most people think you need a deep fryer or a pot of bubbling oil to make real karaage. That is the traditional way, yes, but it’s not the only way to get that savory, juicy interior with a crisp, textured coating.
I’ve made this version of chicken karaage more times than I can count, and I stopped deep-frying a long time ago.
Not because I hate frying, I love the flavor, but because I didn’t want my apartment to smell like oil for two days. And honestly, you can get very close to the real thing with just your oven or an air fryer, and a little bit of smart prep.
This recipe is built around making Japanese karaage chicken that feels authentic enough in flavor and texture, but without the mess or calories of deep-frying. You won’t need any fancy ingredients or tools.
You will, however, need to marinate the chicken for at least 30 minutes, ideally an hour, and use potato starch instead of regular flour; this is key to getting that signature crispy crust even without submerging in hot oil.
Oven or Air Fryer Japanese Chicken Karaage
Ingredients
Equipment
Method
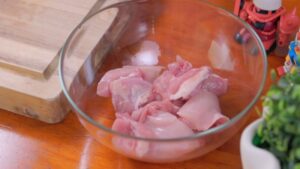
- Prep the ChickenTrim excess fat from chicken thighs.Cut into 1.5-inch bite-sized pieces.Leave skin on for extra crisp if desired.
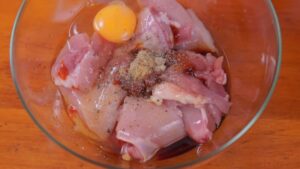
- MarinateIn a bowl, mix soy sauce, sake, garlic, ginger, sesame oil, and sugar.Toss chicken to coat, cover, and refrigerate for 30–90 minutes.
- PreheatOven: 220°C (428°F) convection or 200°C (392°F) standard.Air fryer: No preheating necessary.

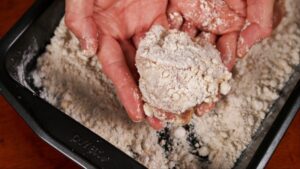
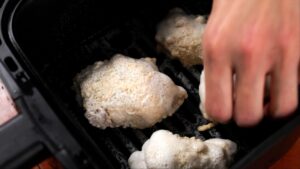
- Drain and CoatRemove chicken from marinade and pat dry once with paper towel.Dredge in potato starch, pressing to coat all sides evenly.Let sit 5 minutes before cooking.
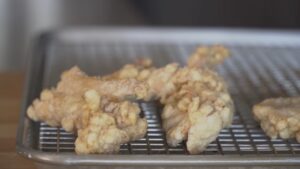
- Cook: Oven MethodPlace chicken on a wire rack over a tray or parchment paper.Lightly brush/spray oil over each piece.Bake 25–28 minutes (convection: 20–22 min), flipping halfway.Broil last 2–3 minutes for extra crispiness.
- Cook: Air Fryer MethodArrange in a single layer in air fryer basket.Spray lightly with oil.Cook at 200°C (392°F) for 14–16 minutes, flipping once.Ensure internal temp reaches 74°C (165°F).
Video
Notes
Cooking Tips
- Thighs over breasts: Stay juicy even if slightly overcooked.
- Marinade = flavor: Garlic and ginger are essential.
- Potato starch only: It’s what gives karaage its authentic crunch.
- Don’t skip the oil: Even a little oil gives better color and texture.
- Let rest after cooking: Helps retain crispiness.
How It Tastes
View this post on Instagram
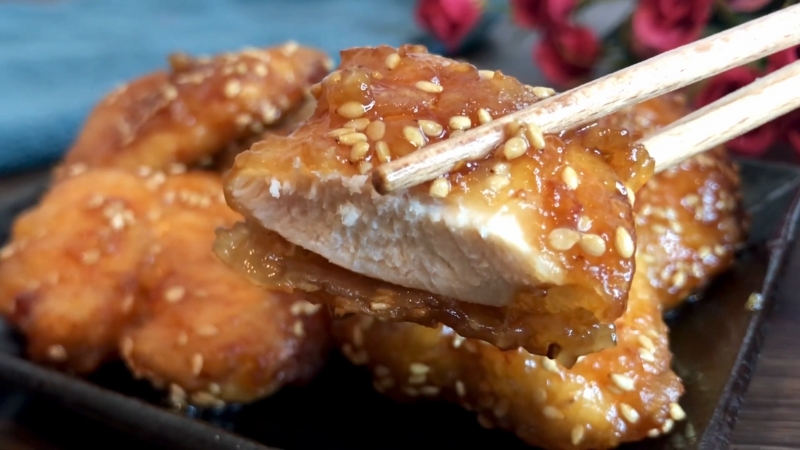
The final result is incredibly satisfying. Even without deep-frying, the potato starch coating gets golden and crisp. It’s not puffed the way double-fried karaage is, but it has a great crunch that holds up for a while after cooking.
The chicken inside is juicy and seasoned throughout thanks to the marinade. The garlic and ginger hit first, then the soy umami lingers. If you squeeze lemon over the top just before serving, it brightens everything and makes it feel lighter.
If you serve it with a side of Japanese Kewpie mayo or spicy mayo, it makes for an incredible pairing, especially with rice and a shredded cabbage salad.
Serving Suggestions
Side
Why It Works
Steamed rice
Absorbs juices, balances salty marinade
Shredded cabbage
Classic izakaya style adds crunch and freshness
Japanese mayo
Creamy counterpoint to crispy texture
Lemon wedges
Brightens the flavor, adds acidity
Miso soup
Complements the umami of the chicken
Pickled veggies
Adds color and cuts the richness of fried-style chicken
You can also make a donburi (rice bowl) with leftover karaage. Just reheat gently in the oven (not microwave), lay over rice, and top with a drizzle of soy-sesame dressing and some green onions. It’s a complete meal that takes almost no time if the karaage is ready.
How to Store and Reheat
Storage Method
Shelf Life
Reheat Recommendation
Fridge (airtight box)
3 days
Reheat in oven/air fryer at 180°C (356°F) for 8–10 min
Freezer (wrapped tightly)
Up to 1 month
Thaw overnight, then reheat in an air fryer or oven until hot
Avoid reheating in the microwave unless you like soggy karaage. It ruins the texture.
Final Thoughts
@littleyukionigiri Japanese fried chicken! (Karaage) No eggs, No deep-frying 🐔 #japaneserecipe #japanesefood ♬ 蜜桃物语 – 仁辰 & 于行
I’ve made this karaage on busy weeknights, for game nights with friends, and even packed it cold in lunchboxes, and it always disappears. Deep-frying is great, but for most of us, it’s not practical more than once a month.
It’s the same reason I started making creamy Tuscan chicken with sun-dried tomatoes – big flavor, less mess, and still feels special.
This recipe gives you that satisfying karaage experience without the effort and oil splatter. The key lies in the marinade, the starch, and the smart use of heat. It’s not a shortcut; it’s just a better way to do it at home.